home safety

If you are buying a home with a well system and not public water you should absolutely be doing a water quality test.  It is best to test the water during the due diligence period you have as a buyer so that if anything comes up in the test results you will have time to consider your options and work out a solution if there is a problem.  Filtration systems can be expensive depending on what you need to remove.

The most common water quality issue that I encounter during the Home Inspection process is Coliform Bacteria.  Coliform is a required test for VA (Veteran Affairs) mortgage loan.  If Coliform is present in a home being bought with this type of loan it will need to be removed prior to purchase.

Coliform bacteria is referred to as an “indicator” organism.  Not all Coliform will carry diseases but they can indicate the presence of other bacteria and viruses that can cause illnesses, such as E. Coli.

If your water test comes back with Coliform present you will want to treat your well system.  This can be done by installing a whole house Chlorination System, Open Air Chlorination System or a UV filtration system.  Each home is different and a water quality and filtration professional should be consulted before investing in a system by yourself. 

If a filtration system is out of your price range another option is “Shocking” the well.  This is a process that involves putting a bleach solution down the well and flushing out the system.  There is a chance that the bacteria can return and you should test your water regularly if you do not have a filtration system in place.

If you are a home buyer and your potential home has coliform present you will want to have a professional shock the well.  Unless you plan on doing it yourself.  You do not want the current homeowners to shock the well on their own.  They may have a friend do it that doesn’t have any experience or know what to do.  They also may not even do it at all and tell you that they did.  I bring up this possibility because I have seen it before.  If you are going to have the sellers correct the issue make sure that you get receipts from a professional well company and follow up with another test to ensure the bacteria is gone.

Here is a basic guideline on shocking a well.  Keep in mind that every system is different and may need different procedures.

  • A typical solution for shocking a well requires 2 cups bleach and 10 gallons of water.
  • Dump the solution into your well.
  • Run a hose from the home to the well and run the water into the well to promote mixing of the solution. When you smell bleach coming out of the hose, shut it off.
  • Allow the well to sit for a few hours.
  • Run the exterior hoses away from the home and any plants and vegetation.
  • Run all the interior faucets and flush the toilets.
  • The flushing process can take a few hours or repeated flushing over a few day.
  • You may see brown water coming out of the faucets during this process.  This is common and is from sediment breaking up from the bleach solution.  Keep running the water and it should work itself out.
  • When you no longer smell bleach at the faucets you should be all set.  Chlorine test strips can also be used.
  • You should re-test your water about a week after shocking to ensure the bacteria is removed.

During the shocking process you should NOT use your water supply.  Here are some other things that you should NOT do during this process:

  • Drink the water
  • Shower
  • Give water to your pets
  • Water your plants
  • Do Laundry (the bleach may discolor your clothes and the rust deposits may stain your clothes)

Like any issue found during a Home Inspection, Coliform bacteria is easily fixed if handled properly.  If shocked properly the water may remain clean for a long time or it may not.  Most experts will advise that you test your well water once a year, while some say every other year.  If you have a shallow dug well you may want to test your water twice a year or more.  Especially if you live a quarter mile from a dairy farm with 100 cows.


I have also seen coliform form inside of a water softener brine tank.  The salt had not been filled and the tank had filled up with water which had a nice thick layer of growth on top of it.  A plumbing cross connection can also back flow waste water back into the system causing contamination.

There are many different ways that Coliform and other bacterias can enter your water supply and several different ways to treat it.  Obviously a high quality filtration system is the ideal solution but if that is not in the budget than hopefully a bottle of bleach is and you can clean your system.

Read more

YES!

End of blog.

Jk, here are some reasons why you absolutely should inspect your potential new condo.

Condos can be a great option for first time home buyers, or people that don’t want to mow the lawn, or maintain a pool, etc.  There are many benefits to owning a condo, there are also some cons.  Every condo association has a set of rules, and fees.  You will want to get a hold of these documents before putting in an offer on your new condo.  Having a good real estate agent will help a lot with this process.

The rules are laid out in what is called a Master Deed, or the Covenants, Conditions and Restrictions (CC&R).  The master deed will lay out how the condo association is governed and the policies for how things run.  The CC&R will lay out rules ranging from: Pets, parking, outdoor grills, hanging laundry, changing exterior designs, roofing, maintenance, quiet hours, etc.  There can be many rules.

With almost all Condos there are monthly fees.  These fees go into the budget for maintaining certain things around the common areas of the condos.  Landscaping, plowing, roof replacement, decks, balconies, siding, etc.  Most associations want the units to all look great which will keep the value of the units up and the tenants happy.  If the roof on one condo has seen the end of it’s days, the association will replace it and use the money from everyones monthly fees to do it.  This can be a great thing for a condo owner.  If the roof leaks and damages the inside of your attic and the insulation, most of the time that is covered.  However, if the pipes burst in your upstairs bathroom and damage the ceiling in your kitchen, that is not the responsibility of the Condo association.  This is why you want a home inspection.  Having an inspection will help you to determine what is and is NOT covered by the HOA and what issues may be inside your condo, or what issues may come up in the future.  Repairs are not a matter of if, but when.

Here is a leak that was found inside a Condo using thermal imaging.  

Without thermal imaging this leak would never have been seen, it cam from the refrigerator water line from the unit up above.  Without an inspection this buyer could have bought this unit and walked into a condo with an active leak above head and a bill to fix it right away.

Knowing what is and is not covered by the HOA (Home Owners Association) is not the job of a home inspector.  A good inspector will inspect the roof of a condo and the common areas associated with the unit being inspected.  Knox Home Inspections treats a condo the same as any other house.

Here’s an example…


That is the main entrance to a 6 unit, garden style condo building.  There are 2 electric code violations going on here and these people walk by, and over it every day.  The junction box directly below the door should not be in an area that has foot traffic, it should be off to the right and out of the walkway.  This is for safety.  The second violation is the circuit that is running into the gutter and up to the 3rd story flood light above.  The gutter is acting as a conduit for the circuit, it is also draining all of the water from the roof above.  Water and electricity DO NOT mix.  This whole situation should be re configured by an electrician ASAP.  This is a tricky situation for my client who is buying this unit.  My recommendation to them was to have this corrected by a professional.  Is this the responsibility of the buyer or the HOA?  That is where you want to read all of that paperwork we mentioned above and determine what to do from that.

Some HOA’s have zero fees.  Maintenance on these units can fall on the owners themselves and can be tricky with repairs and the cost of those repairs.  See the picture below of a Condex split down the middle.

All new vinyl siding on the right, and original wood siding on the left that is peeling badly.  The roof has been replaced on the right side and they wove it right into the old side on the left.  There is a lot of moss and lichen on the left side and that whole side needs to be replaced.  Also the dryer vent has no cover on it, it’s between the AC unit that is leaning over and the bulkhead.  That is direct access for critters and moisture, which can lead to damage.  The deck on the left is the original wood and the deck on the right is all new Trex material and is very nice.  This is clearly a situation where the HOA does not cover repairs on the exterior of the units.  Again you must read the CC&R to determine what is an is not covered for repairs.  Inspecting this unit was tricky because we could not inspect the other half of the house.  All we could do was inform them of what was seen from the outside and how that may effect there side.

Arm yourself with as much knowledge as possible before buying your condo.  Get a copy of all of the documents you can and read them all.  And don’t forget the home inspection…

Read more

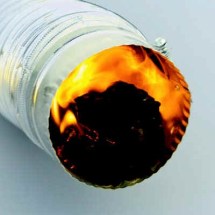
In 2005 dryer vents were responsible for about 14,000 house fires.  This is a shame because many could have been prevented with the proper connections, set up and regular cleaning.  Over time the lint from the dryer will build up inside the exhaust duct and can cause a fire.  One indication that the duct is becoming blocked is if your dryer heats up but the clothes inside are still damp when they are done.  This can indicate that the warm, moist air is being restricted and not leaving the dryer as it should.

vent fire

Most newer homes are set up with dryer safety in mind and easy access to clean, where some older homes the location and access is not ideal and it can be more difficult to clean.  You should clean the exhaust duct on a regular basis.  Disconnect the exhaust duct and stick a shop vacuum in there and reconnect after.

A few things that I look for when I am inspecting dryer vents:

Is the duct connected and go all the way outside?

Some ducts are not connected properly and some just come loose over time. Some ducts vent into a crawlspace or attic.  This will put that moist warm air into places where it can linger and lead to moisture issues and possibly mold.  You want the warm moist air to go OUTSIDE.  There can be backflow protection, but not a screen.  A screen will just catch all the lint and block up faster.

vent2

How long and how straight is the duct?

The duct should be as straight and as short as possible.  No longer than 25 feet.  Each 90 degree bend in the pipe reduces the total allowable distance by 5 feet.

What is the duct made of?

The duct should be METAL.  The duct should be smooth on the inside and not have any fasteners or screws going into it that could catch lint and cause a build up.

Lastly, do not connect 2 separate dryers to the same vent like this picture:

vent

If your laundry load really requires 2 separate dryers, please take the time and install another vent to the outside and run 2 separate exhaust ducts.  One for each dryer unit.  Or go to the Laundry Mat. 

For more information on Home Inspections contact us at: Knoxinspect.com

Read more